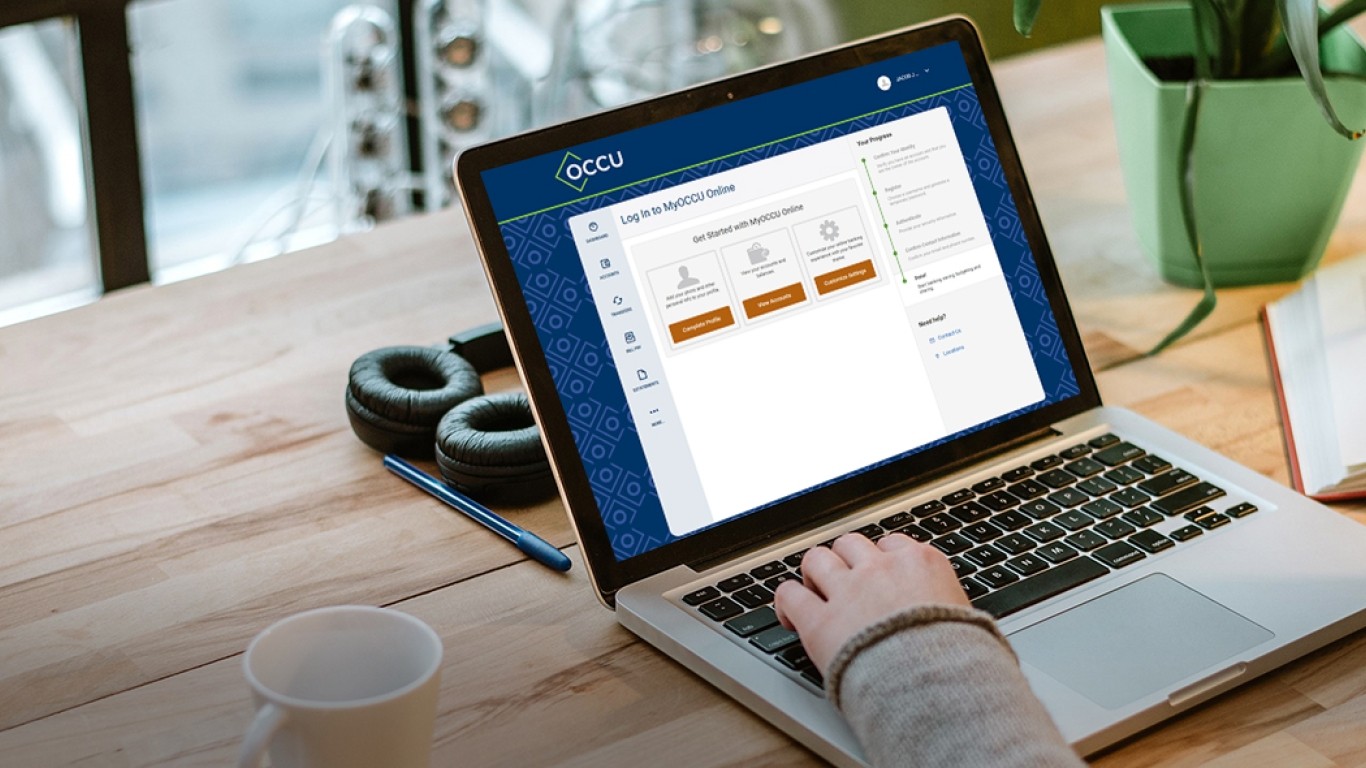
In the Transfers tab on MyOCCU Online & Mobile you can transfer funds between your accounts, to other OCCU members and to external accounts. From here, you’ll be able to easily monitor your transfer activity and history. On MyOCCU Mobile, transferring funds is simple and quick. See the guides below for enhanced transfer options on MyOCCU Online.
Move money fast
Here’s how to get started with Transfers to move money quickly to your OCCU loans, another OCCU member, or to an external account. You can also check your transfer history and even schedule a future transfer.
-
Choose accounts
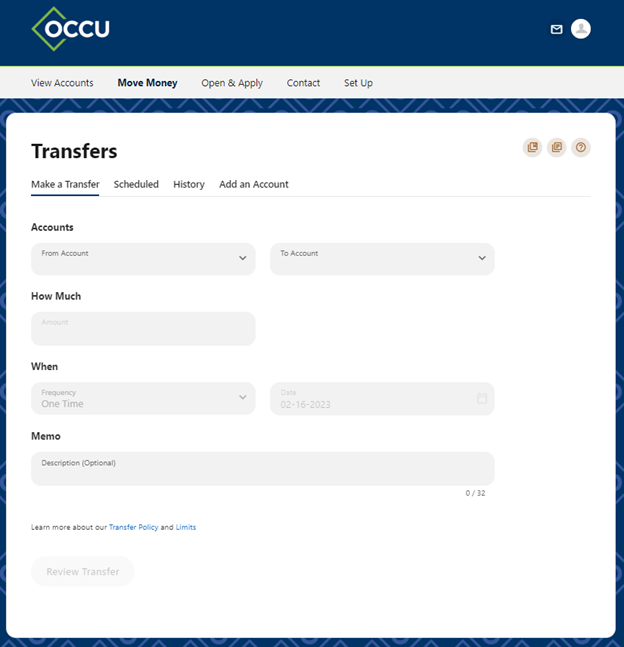
Choose the account to transfer from using From Account. Choose the account to transfer into using To Account.
-
Enter How Much
The amount can only be added once the accounts are selected.
-
Select When
Choose the Frequency from the drop-down menu. There are several options to give you as much flexibility as possible. If you select a repeating frequency, you can then choose when to end the repeats:
- Never: Transfers will continue repeating until you change the setting.
- On a specific date.
- After a certain number of occurrences.
Select the Date to perform the transfer. By default, today’s date is selected, but you can choose a date in the future to schedule the transfer.
-
Add memo
Optional: Add a personal note to remember what the purpose of the transfer is.
Transfer funds to another OCCU member
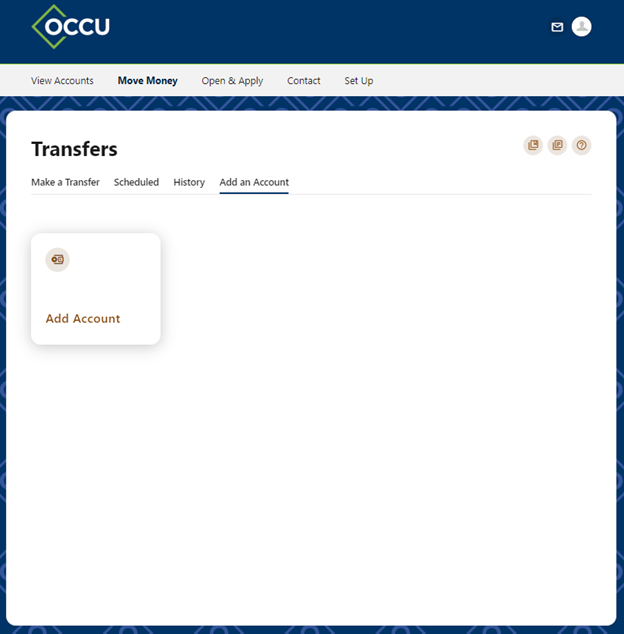
You can transfer money to another OCCU member without configuring an external account. Select the Add an Account tab and then select the Add an Account button.
Note: You’ll need the member’s first name, last name and their account number (not their member number).
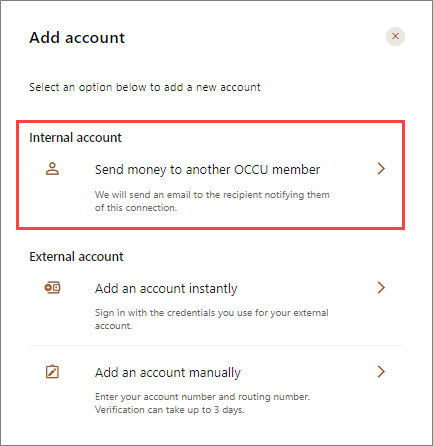
From the list of options, select Send money to another OCCU Member.
Enter the member’s first and last name, verification method, and their account number (not their member number). Next select the checkbox to save the account for future transfers.
Transfer funds to or from an account at another financial institution
You can also transfer money to and from another account or financial institution. Now there are two ways to add an external account to your MyOCCU banking profile. Adding an account instantly makes your external account available for transfers immediately. All you will need is your external account online login credentials to get started! Or you can use the traditional option of setting up an account manually.
-
Select
Select Add an Account tab and then click the Add an Account button.
-
Add an external account
Select Add an account instantly and fill out the following information about your external account:
- Select or search for your external financial institution.
- Username.
- Password.
- Re-enter Password.
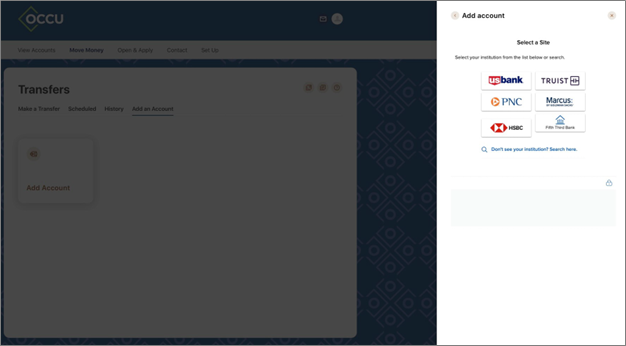
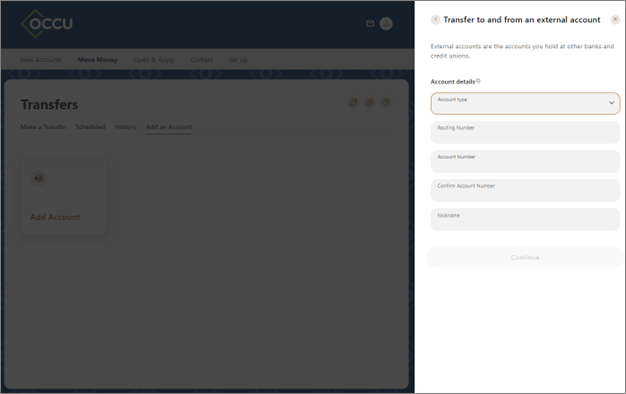
Or select Add an account manually and fill out the following information about your external account:- Account type (checking or savings).
- Routing number.
- Account number.
- Confirm account number.
- A nickname that will be used for future transfers.
-
Monitor
Monitor the external account for two micro-transactions. You’ll see a message on your dashboard prompting you to enter the amounts of these transactions until you confirm.
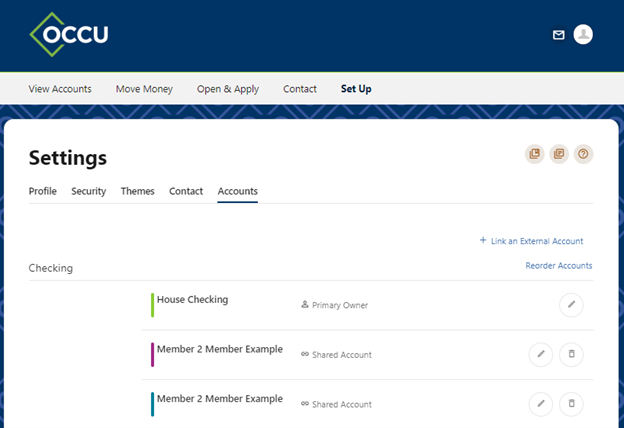
Once you’ve confirmed the external account, it will be available in your list of accounts to move money in and out of easily. You can also add external accounts by navigating to Settings and choosing the Accounts tab. Learn more in the Get to Know MyOCCU Online & Mobile article.
Edit or remove an external account
-
Navigate
Navigate to Settings. Choose the Accounts tab.
-
Edit
Use the Pencil icon to edit the account or the trash can icon to remove the link to the account. If you delete linked accounts, you will have to go through the confirmation process again.
Monitor your scheduled transfers
Use the Pencil icon to edit the account or the trash can icon to remove the link to the account. If you delete linked accounts, you will have to go through the confirmation process again.
-
Filters
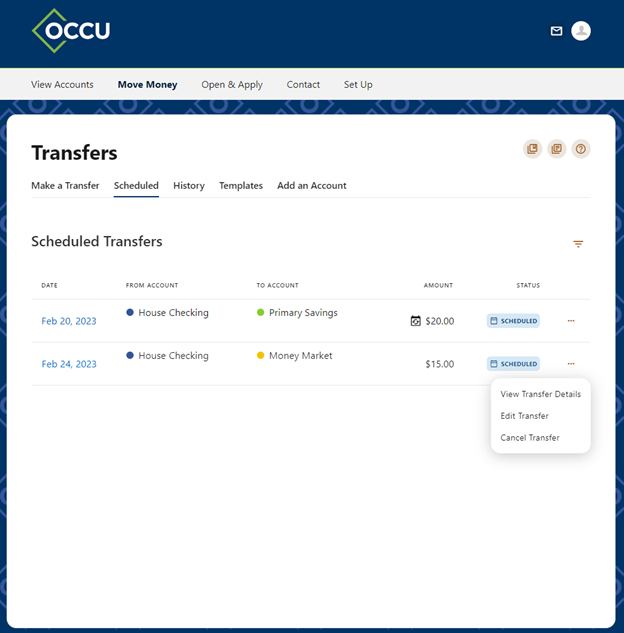
Choose the Filter on the right to filter by accounts, status type, or date type.
-
Edit scheduled transfers
You can click on the ellipsis to view transfer details, edit the transfer or series of transfers, or cancel and remove the scheduled transfer.
View your transfer history
Use the History tab to see past transfers, both one-off and scheduled. They are displayed with the date, amount, accounts and a success message.
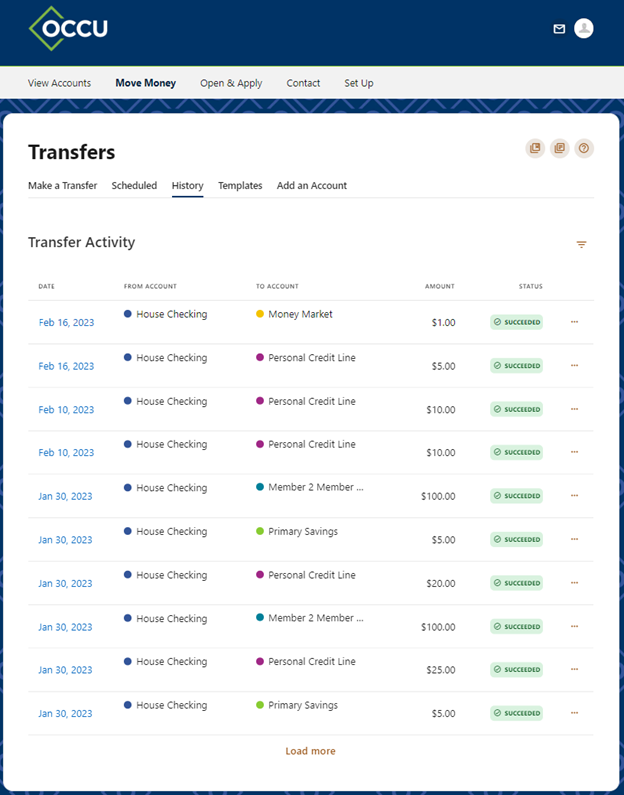
By default, the transfers are sorted by date, but you can use the filter to view specific transactions.
