Creating a role
From the Business Admin widget, you can create roles for new users, create users and manage existing users. Navigate to the Roles tab under the Business Admin widget to begin.
-
Add a role
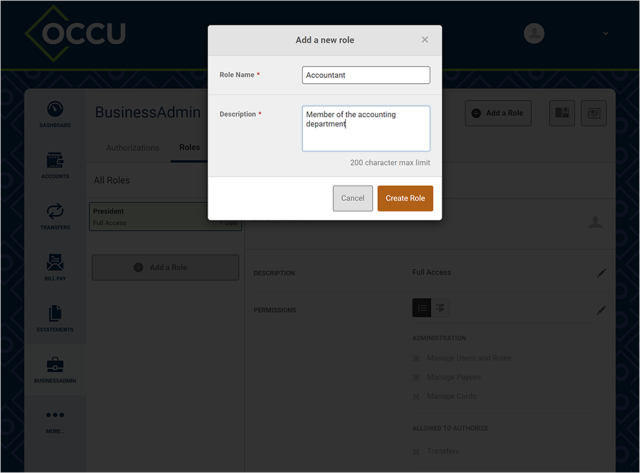
Choose the Add a role button, enter a role name and a description. Use the Create role button to continue.
-
Assign permissions
- Choose the pencil icon in the permissions section to display checkboxes.
(Tip: To view additional descriptions, toggle the boxes between the word permissions and the pencil icon.) - Check the boxes for the permissions you would like the user to have.
- Use the Save Changes button to continue.
- Choose the pencil icon in the permissions section to display checkboxes.
-
Select accounts
- Choose the Add Accounts button.
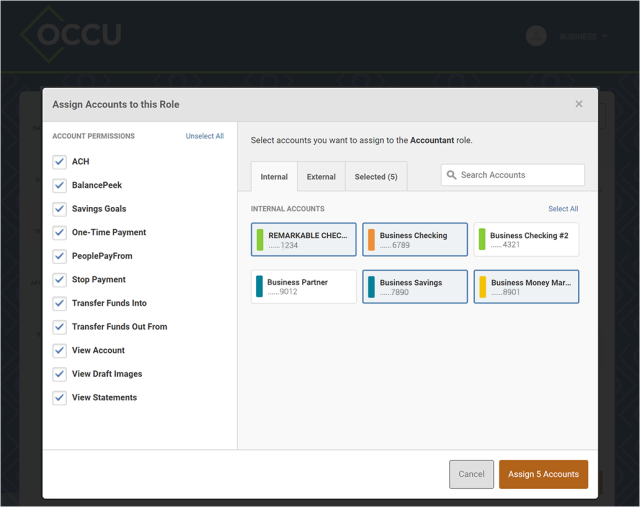
- Check the boxes for the account permissions the user should be allowed to initiate.
- Use the Choose Accounts button to continue.
- Select the accounts to assign to the role. Accounts are separated into tabs by internal and external accounts.
- When accounts have been selected, the Assign X Accounts button will reflect the number of selected accounts. Choose this button to continue.
-
-
Manage existing users
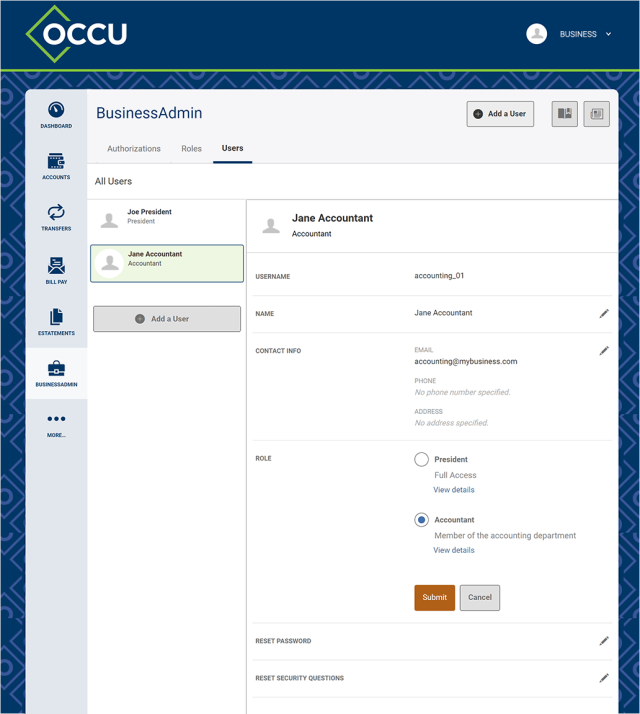
From the Users tab, choose the user you would like to manage. As a business admin, you are responsible for troubleshooting any issues your entitled users may have. Below you will learn how to edit the following areas for each user. For additional assistance the business admin must contact OCCU; the entitled user should not.
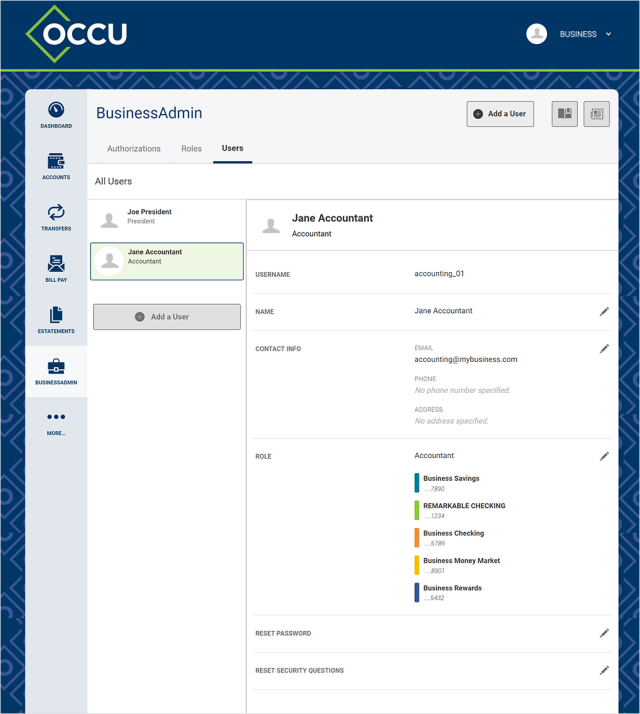
Edit contact info, name or role
Use the pencil icon next to the appropriate section. Please note to modify a user’s permissions within a role, you must go through the Roles tab.
Reset a user’s password
- Use the pencil icon next to password.
- Choose the method for sending a new password.
- Provide a reason for resetting the password.
- Use the Submit button to continue.
Delete a user
Use the Delete User button at the bottom of the page.
